- Ethereum Tutorial
- Ethereum - Home
- Ethereum - Introduction
- Ethereum - Smart Contracts
- Ethereum - Solidity for Contract Writing
- Ethereum - Developing MyContract
- Ethereum - Compiling the Contract
- Ethereum - Deploying the Contract
- Ethereum - Interacting with the Contract
- Ethereum - Limitations of Remix
- Ethereum - Ganache for Blockchain
- Ethereum - Ganache Server Settings
- Ethereum - A Quick Walkthrough
- Ethereum - MyEtherWallet
- Ethereum - Creating Wallet
- Attaching Wallet to Ganache Blockchain
- Ethereum - Deploying Contract
- Interacting with Deployed Contract
- Ethereum - Creating Contract Users
- Ethereum - Summary
- Ethereum Useful Resources
- Ethereum - Quick Guide
- Ethereum - Useful Resources
- Ethereum - Discussion
- Selected Reading
- UPSC IAS Exams Notes
- Developer's Best Practices
- Questions and Answers
- Effective Resume Writing
- HR Interview Questions
- Computer Glossary
- Who is Who
Attaching Wallet to Ganache Blockchain
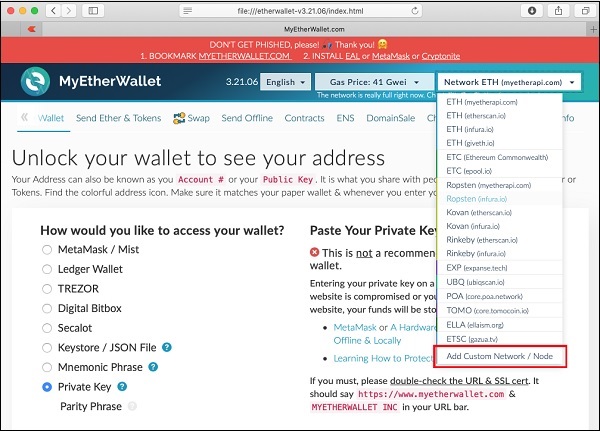
You have now created a wallet; this wallet is a client interface to the Blockchain. We will attach the wallet to the Ganache Blockchain that you have started in the earlier lesson. To do so, click on the Network dropdown box as shown in the screenshot below −

Go to the bottom of the list. You will see an option for “Add Custom Network / Node”. Select this item.
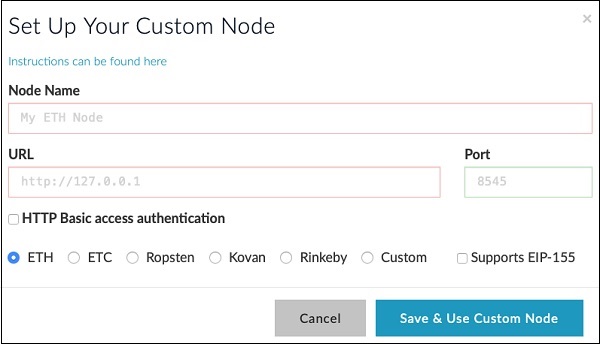
Now, a screen will appear asking for the Ganache server address and the port to which it is listening.

Type your Ganache server details – http://127.0.0.1 and Port: 8545. These would be the values set by you in the Ganache server setup. Give a name of your choice to this node. Click on the “Save & Use Custom Node” button. You will see the connected message at the bottom of the screen. At this point, your wallet is successfully connected to the Ganache Blockchain.
You are now ready to deploy the contract on this connected Blockchain.