- Ethereum Tutorial
- Ethereum - Home
- Ethereum - Introduction
- Ethereum - Smart Contracts
- Ethereum - Solidity for Contract Writing
- Ethereum - Developing MyContract
- Ethereum - Compiling the Contract
- Ethereum - Deploying the Contract
- Ethereum - Interacting with the Contract
- Ethereum - Limitations of Remix
- Ethereum - Ganache for Blockchain
- Ethereum - Ganache Server Settings
- Ethereum - A Quick Walkthrough
- Ethereum - MyEtherWallet
- Ethereum - Creating Wallet
- Attaching Wallet to Ganache Blockchain
- Ethereum - Deploying Contract
- Interacting with Deployed Contract
- Ethereum - Creating Contract Users
- Ethereum - Summary
- Ethereum Useful Resources
- Ethereum - Quick Guide
- Ethereum - Useful Resources
- Ethereum - Discussion
- Selected Reading
- UPSC IAS Exams Notes
- Developer's Best Practices
- Questions and Answers
- Effective Resume Writing
- HR Interview Questions
- Computer Glossary
- Who is Who
Ethereum - Creating Wallet
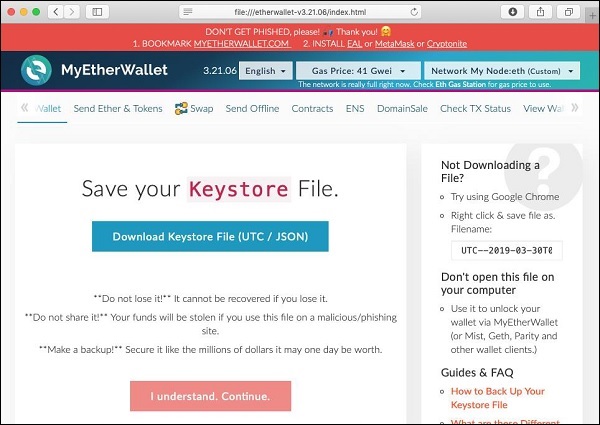
In this chapter, we will learn how to create Ethereum wallet. To create a new wallet, enter a password of your choice and then click on the “Create New Wallet” button. When you do so, a Wallet would be created. A digital wallet is essentially the generation of a public/private key pair that you need to store in a safe place. The wallet creation results in the following screen −

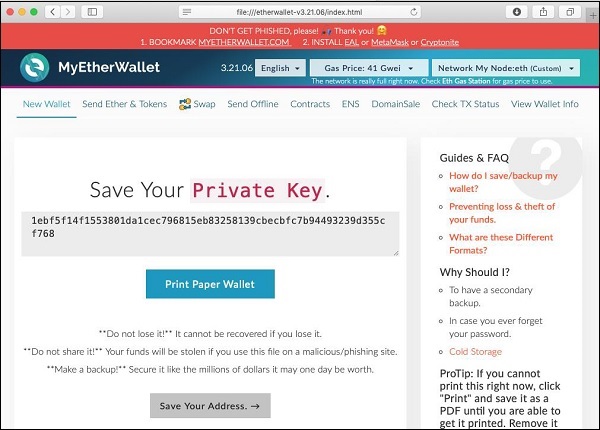
Click on the “Download Keystore File (UTC / JSON)” button to save the generated keys. Now, click on the “I understand. Continue” button. Your private key will appear on the screen as seen in the screenshot below −

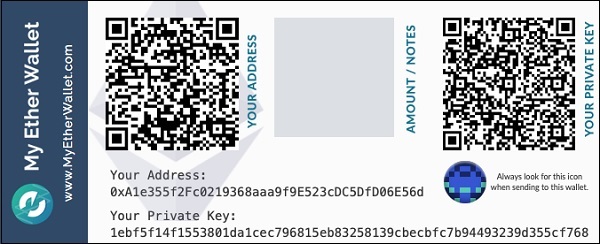
Click on the “Print Paper Wallet” button to keep a physical record of your wallet’s private key. You will need this later for unlocking the wallet. You will see the following screen. Do not lose this output.

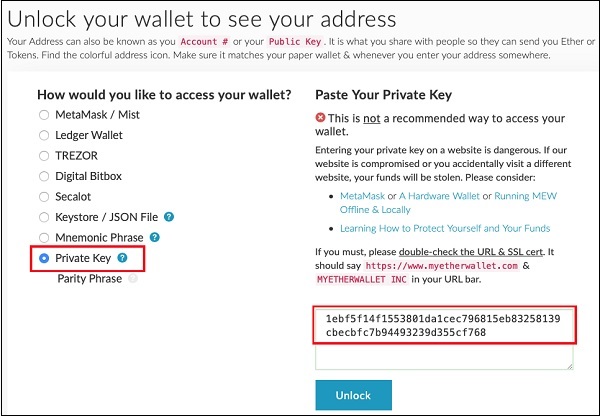
To unlock your wallet, click on the “Save Your Address” button. You will see the following screen.

The wallet can be unlocked using the Private Key option as highlighted in the above screen. Cut-n-paste the private key from the previous screenshot and click the Unlock button. Your wallet will be unlocked and you will see a message appear at the bottom of the screen. As the wallet does not contain anything as of now, unlocking the wallet is not really useful to us at this point.