- Ethereum Tutorial
- Ethereum - Home
- Ethereum - Introduction
- Ethereum - Smart Contracts
- Ethereum - Solidity for Contract Writing
- Ethereum - Developing MyContract
- Ethereum - Compiling the Contract
- Ethereum - Deploying the Contract
- Ethereum - Interacting with the Contract
- Ethereum - Limitations of Remix
- Ethereum - Ganache for Blockchain
- Ethereum - Ganache Server Settings
- Ethereum - A Quick Walkthrough
- Ethereum - MyEtherWallet
- Ethereum - Creating Wallet
- Attaching Wallet to Ganache Blockchain
- Ethereum - Deploying Contract
- Interacting with Deployed Contract
- Ethereum - Creating Contract Users
- Ethereum - Summary
- Ethereum Useful Resources
- Ethereum - Quick Guide
- Ethereum - Useful Resources
- Ethereum - Discussion
- Selected Reading
- UPSC IAS Exams Notes
- Developer's Best Practices
- Questions and Answers
- Effective Resume Writing
- HR Interview Questions
- Computer Glossary
- Who is Who
Ethereum - Ganache Server Settings
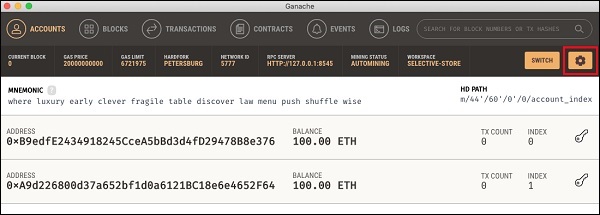
Click on the settings icon at the top right hand side of the screen as shown in the screenshot below −

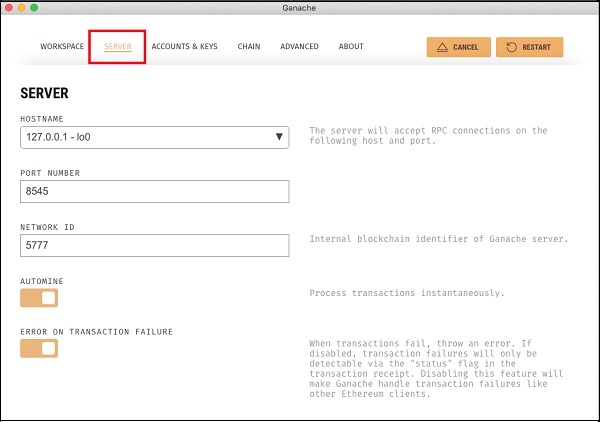
The server settings screen will appear as shown below −

Here, you will be able to set the values of server address and the port number for your Ganache server. For the time being, leave these to their default values. The Network ID is an internal Blockchain identifier of Ganache server; leave this to its default value. The Automine button is in the ON state indicating that the transactions would be processed instantly. If you switched this off, it will ask you to enter the time in seconds after which the blocks would be mined.
Account and Keys
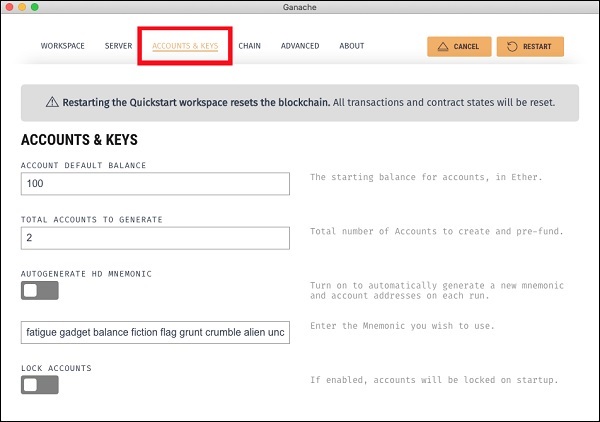
When you click on the Accounts & Keys menu option, you will see the following screen −

Here you would be able to set the default balance for each account. The default value is 100. This now explains why you saw 100 ETH displayed for each account in the Desktop screenshot. You can also set the number of accounts on this screen. The value displayed in this screenshot is 2 and that is why the desktop showed only two accounts.
Now, we will work out with the two settings’ screen; the knowledge of how these two work would suffice. Restart the server by clicking on the RESTART button in the right hand side of the screen. You will now return to the Desktop screen. Try inputting different values in the above two fields, restart the server and see its effect.