- MS Word Basics
- Word - Home
- Word - Getting Started
- Word - Explore Window
- Word - Backstage View
- Word - Entering Text
- Word - Move Around
- Word - Save Document
- Word - Opening a Document
- Word - Closing Document
- Word - Context Help
- Editing Documents
- Word - Insert Text
- Word - Select Text
- Word - Delete Text
- Word - Move Text
- Word - Copy & Paste
- Word - Find & Replace
- Word - Spell Check
- Word - Zoom In-Out
- Word - Special Symbols
- Word - Undo Changes
- Formatting Text
- Word - Setting Text Fonts
- Word - Text Decoration
- Word - Change Text Case
- Word - Change Text Color
- Word - Text Alignments
- Word - Indent Paragraphs
- Word - Create Bullets
- Word - Set Line Spacing
- Word - Borders and Shades
- Word - Set Tabs
- Word - Apply Formatting
- Formatting Pages
- Word - Adjust Page Margins
- Word - Header and Footer
- Word - Add Page Numbers
- Word - Insert Page Breaks
- Word - Insert Blank Page
- Word - Cover Pages
- Word - Page Orientation
- Working with Tables
- Word - Create a Table
- Word - Rows & Columns
- Word - Move a Table
- Word - Resize a Table
- Word - Merging Cells
- Word - Split a Table
- Word - Split Cells
- Word - Add Formula
- Word - Borders & Shades
- Advanced Operations
- Word - Quick Styles
- Word - Use Templates
- Word - Use Graphics
- Word - Auto Correction
- Word - Auto Formatting
- Word - Table of Contents
- Word - Preview Documents
- Word - Printing Documents
- Word - Email Documents
- Word - Translate Document
- Word - Compare Document
- Word - Document Security
- Word - Set Watermark
- Word Useful Resources
- Word - Quick Guide
- Word - Useful Resources
- Word - Discussion
- Selected Reading
- UPSC IAS Exams Notes
- Developer's Best Practices
- Questions and Answers
- Effective Resume Writing
- HR Interview Questions
- Computer Glossary
- Who is Who
Rows & Columns in Word 2010
In this chapter, we will discuss how to work with rows and columns in Word 2010. As discussed in the previous chapter, a table is a structure of vertical columns and horizontal rows with a cell at every intersection. A Word table can contain as many as 63 columns but the number of rows is unlimited. This chapter will teach you how to add and delete rows and columns in a table.
Add a Row
Following are the simple steps to add rows in a table of a word document.
Step 1 − Click a row where you want to add an additional row and then click the Layout tab; it will show the following screen.
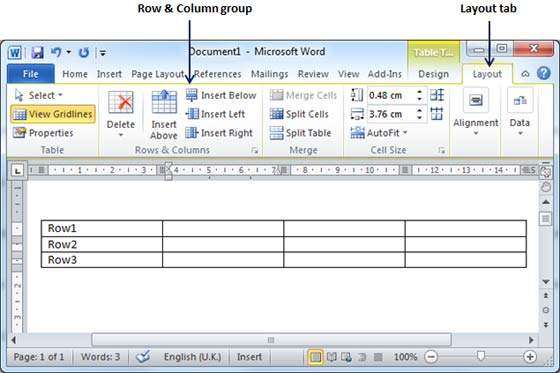
Step 2 − Now use the Row & Column group of buttons to add any row below or above to the selected row. If you click the Insert Below button, it will add a row just below the selected row as follows.
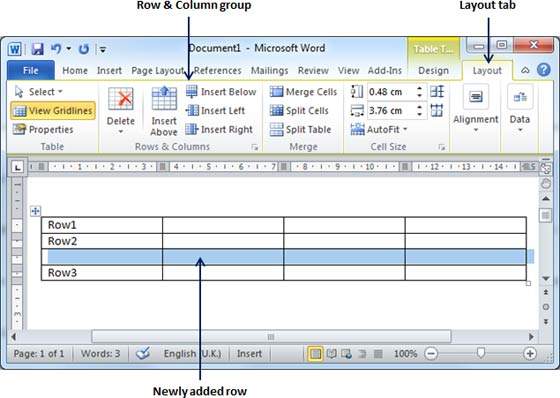
If you click the Insert Above button, it will add a row just above the selected row.
Delete a Row
The following steps will help you delete rows from a table of a Word document.
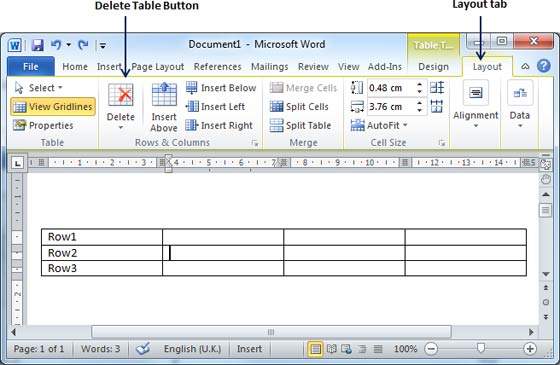
Step 1 − Click a row which you want to delete from the table and then click the Layout tab; it will show the following screen.
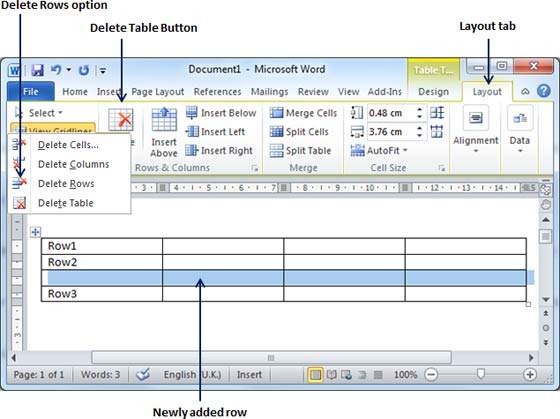
Step 2 − Click the Layout tab, and then click the Delete Rows option under the Delete Table Button to delete the selected row.
Add a Column
The following steps will help you add columns in a table of a Word document.
Step 1 − Click a column where you want to add an additional column and then click the Layout tab; it will show the following screen.
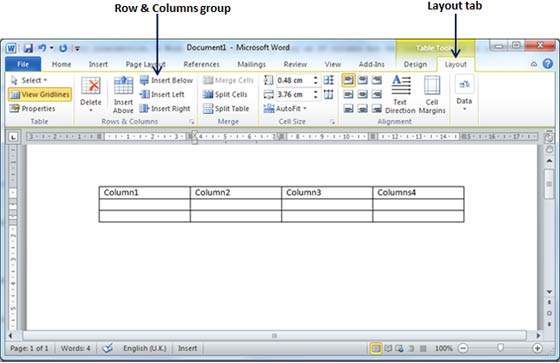
Step 2 − Now use the Row & Column group of buttons to add any column to the left or right of the selected column. If you click the Insert Left button, it will add a column just left to the selected column as follows.
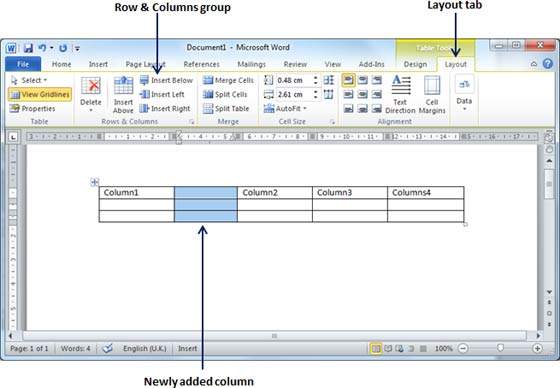
If you click the Insert Right button, it will add a column just next to the selected column.
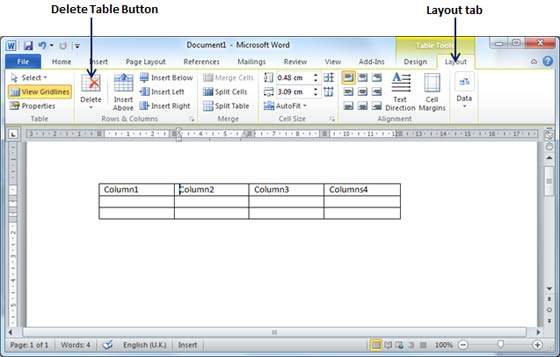
Delete a Column
Following are the simple steps to delete columns from a table of a word document.
Step 1 − Click a column which you want to delete from the table and then click the Layout tab; it will show the following screen.
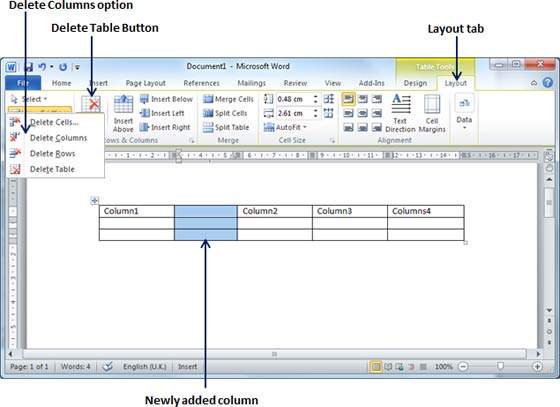
Step 2 − Click the Layout tab, and click the Delete Column option under the Delete Table Button to delete the selected column.